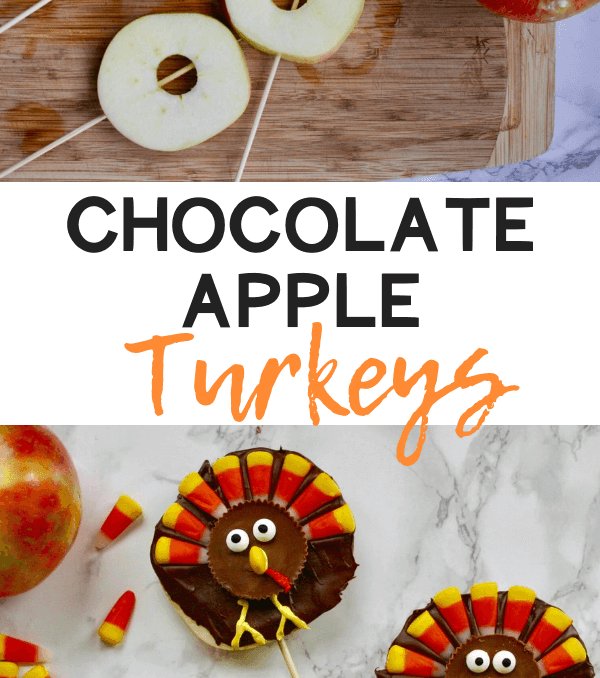
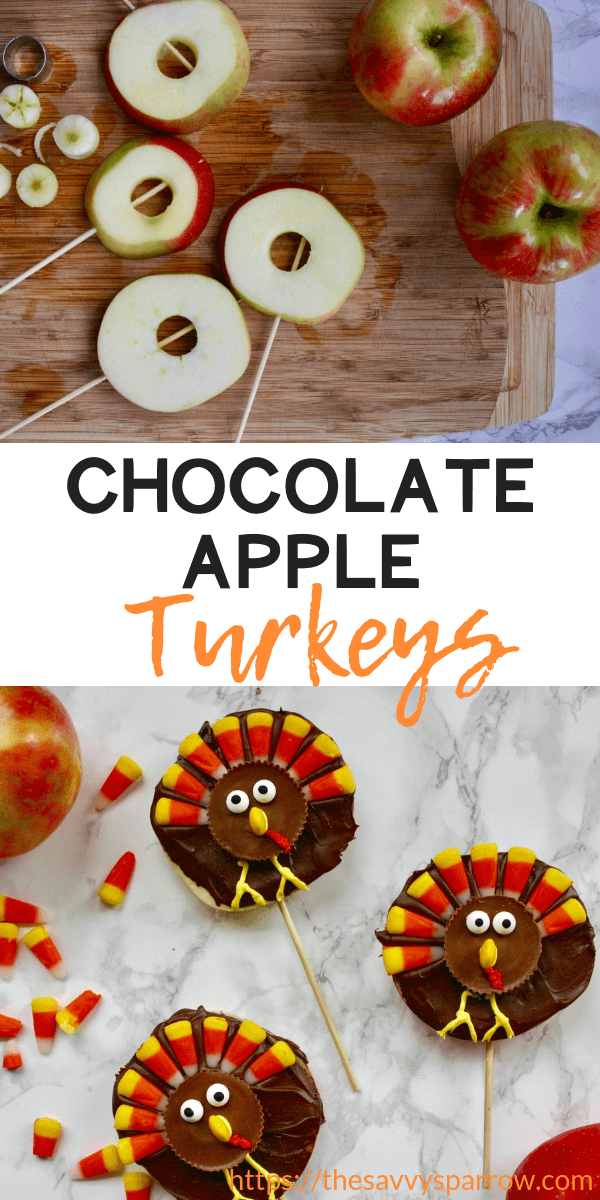
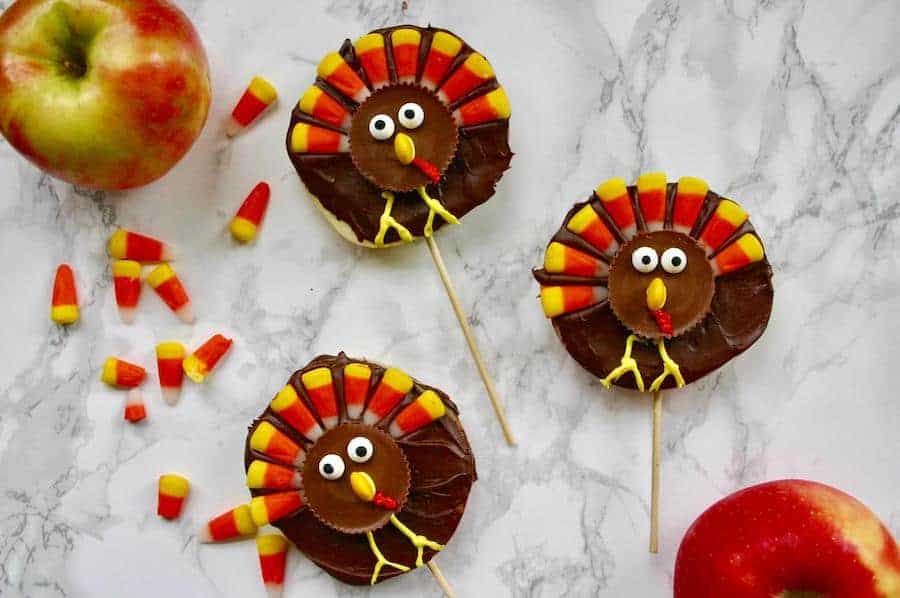
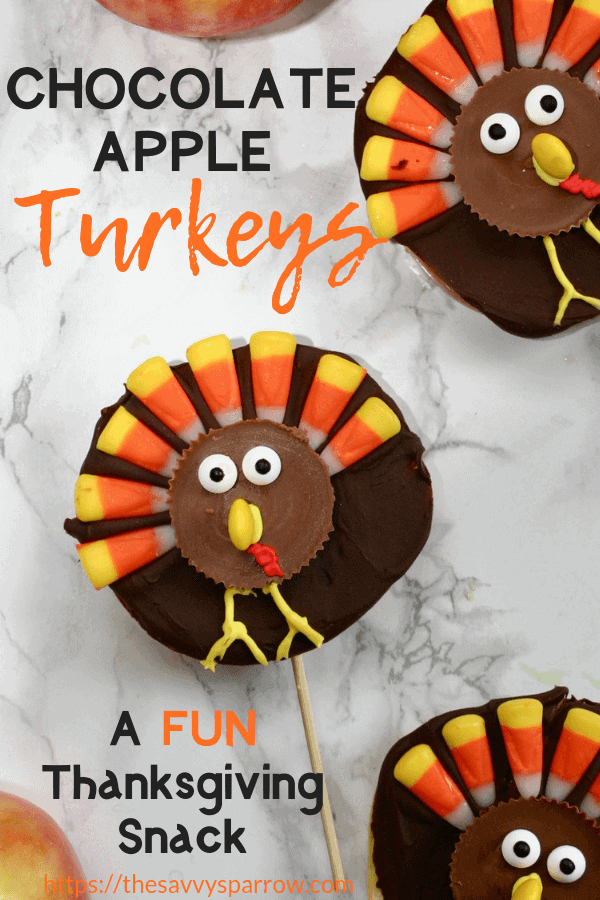
If you’re looking for fun and cute Thanksgiving snacks for kids, then look no further! These chocolate turkeys made with apple slices are the perfect way to celebrate Thanksgiving with your little ones.
UPDATED: November 21, 2020
You know the old saying, “An apple a day keeps the doctor away.”? I wonder if that applies to apples dipped in chocolate?
I think yes.
Something about the combination of apples and candy just speaks to my dessert-loving heart. Whether it’s candy apples, caramel apples, or chocolate-dipped apples, I LOVE them all!
So when I had the idea to make these cute chocolate turkeys with apple slices for “the kids”, it was really for my own benefit, too!
Make a batch of these chocolate turkey apple slices to serve as Thanksgiving dessert for kids, or take them to your child’s classroom Thanksgiving party. Just cut some apples, melt some chocolate, and decorate for super cute turkey treats for kids!
*This post contains affiliate links, which means if you click a link and make a purchase, I earn a commission at no additional cost to you. Read my full disclosure here.
Here’s how to make these cute Thanksgiving snacks for kids:
Ingredients for Chocolate Apple Turkey Treats
Here’s what you need to make these cute turkey treats:
- Royal icing (we used this recipe)
- Red and yellow gel colors to tint your icing (This is what we used) – Divide your icing in half and tint one half red and one half yellow.
- One bag of semi-sweet chocolate chips – I don’t recommend using milk chocolate because I find that it doesn’t harden as well as semi-sweet.
- Yellow M&Ms
- Candy Corn
- Large Reese’s Cups – Be sure to buy a few extras! Some of mine were not so pretty when I unwrapped them because the chocolate had gotten stuck to the top of the wrapper.
- Candy Eyeballs
- Wooden skewers (optional)
How to Make Chocolate Turkeys with Apple Slices
Step 1: Make and color the royal icing.
We made our royal icing using this recipe, which turned out great! However, we had a TON of icing leftover, so I would recommend that you split the recipe in half to make these chocolate apple turkey snacks.
Once you’ve made the royal icing, split it into two bowls. Then, tint one bowl red and one bowl yellow using the gel food colors.
Step 2: Cut apples into slices about 1/2″ thick.
Once your icing is done, it’s time to prep your apples.
I used Honeycrisp apples because that’s the apple variety that my kids prefer. Honeycrisps are crisp and firm and can stand up to the heat of the melted chocolate, so they’re great for these chocolate turkey treats.
When cutting your apples, be sure to not cut the slices too thin because they could break in half.
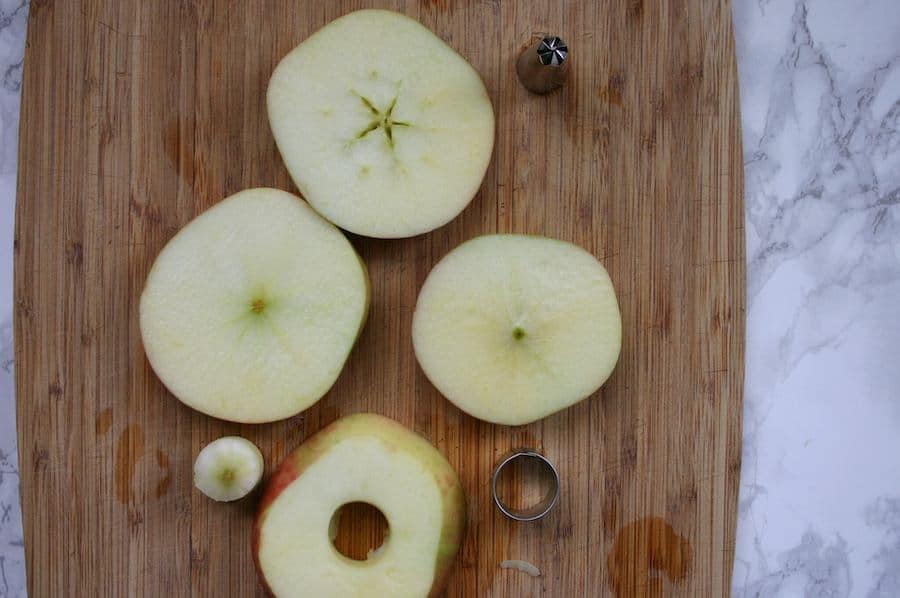
Step 3: Core apples using a small circle cookie cutter.
If you don’t have a small round cookie cutter, then you can also use a paring knife to carefully core the apple slices. It doesn’t have to look perfect, because the hole will be covered by a Reese’s cup later.
However, I don’t recommend using the end of an icing piping tip, as some people suggest for making apple donuts. I found it incredibly difficult to use that method because the apple cores kept getting stuck in the piping tip.
Luckily, my husband had a small circle cookie/fondant cutter in his bag of baking goodies, so I didn’t pull my hair out trying to core a bunch of apple slices.
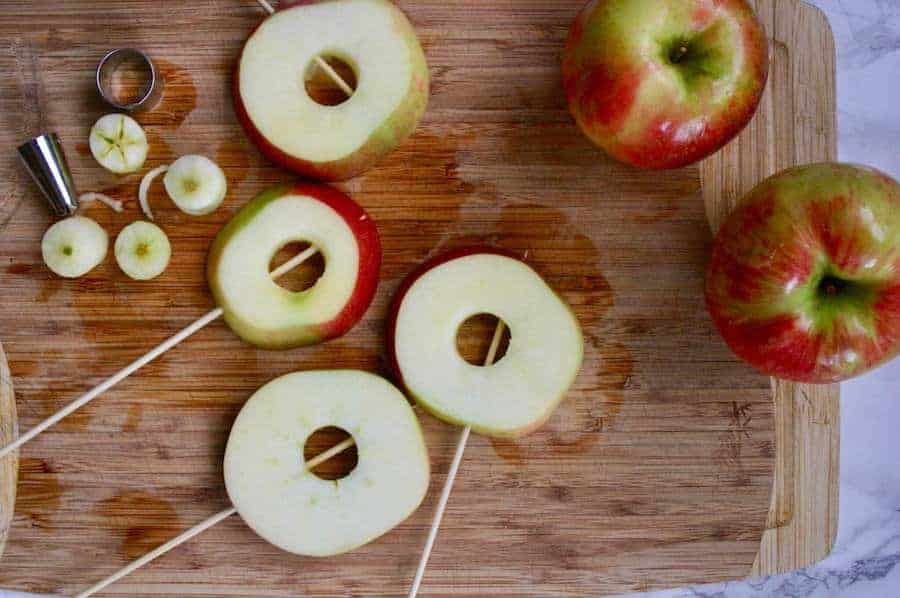
Step 4: Skewer apple slices using wooden skewers. (Optional)
You can totally skip this step and just let your kids pick up their apple turkeys without the stick.
Piece of advice though… don’t even attempt to use a cute lollipop stick. The Honeycrisp apples are way too firm to skewer with a lollipop stick. The wooden skewers with the pointed ends were much easier, but keep in mind that if you’re making these cute Thanksgiving snacks for younger kids, the skewers could be a hazard.
Step 5: Melt semi-sweet chocolate chips.
The best way that I’ve found to melt a large quantity of chocolate chips is with a make-shift double boiler.
To make your own “double boiler”, boil water in a sauce pan about 1/4 of the way full. Place a glass bowl on top of the pan so that it rests just above the steam from the hot water. Dump your chocolate chips in the bowl and stir often with a spatula. The steam from the water heats the bottom of the glass bowl which in turn melts the chocolate. But be careful, your bowl will get HOT!
Or, you can also microwave the chocolate chips to melt them. Just dump the chocolate in a microwave-safe bowl, and heat in 30 second increments, stirring in between, until melted. Just be careful to not burn the chocolate!
As I mentioned before, I prefer to use semi-sweet chocolate chips when I’m dipping fruit/marshmallows/potato chips/etc, because it hardens better than milk chocolate.
Step 6: Dip apple slices into chocolate and immediately add Reese’s Cups and candy corn.
Just take one apple slice and dunk it into the melted chocolate, until the entire top is covered. I didn’t coat the entire apple slice front and back, because I didn’t want it to be chocolate-overload.
Then, add the Reese’s cups and candy corn before the chocolate has a chance to dry. The melted chocolate will act as a glue to keep your decorations in place.
Here’s what your cute Thanksgiving snacks for kids should look like at this point:

Step 7: Add eyes, beak, gobble, and feet to your cute Thanksgiving snacks for kids.
Using a very fine piping tip and icing bag, add yellow feet to your chocolate apple turkeys.
Then, use the royal icing to adhere the candy eyeballs and the M&M. I placed my yellow M&Ms on their sides sticking straight up to look more like a beak.
Finally, pipe a red gobble to complete your super cute apple turkeys.
And that’s it!
*You can store the chocolate apple turkeys in the fridge for a day or two, but it’s best to eat them pretty quickly. After 2 days, the apples start to get mushy and they’re not as good.
Enjoy your cute Thanksgiving snacks for kids!
I hope your kids LOVE these cute Thanksgiving treats… I know mine did!
Take them as a fun treat to your child’s Thanksgiving school party, or serve them as dessert at the kids’ table this holiday. You may even find yourself sneaking one after the kids go to bed… did I forget to mention, these little guys are super tasty!
Love these Cute Thanksgiving Snacks for Kids?! Check out some of my other Thanksgiving ideas:
- Roll a Pumpkin Game – Free Printable Dice Game for Kids!
- Thanksgiving Conversation Starters – Free Printable Conversation Cards!
- Thanksgiving Countdown Checklist with FREE Printable!

Comments & Reviews
do you dip both sides of the apples …If not what prevents the other side from turning brown…
Hi Margaret! We didn’t dip both sides, but you could. When I prep a bunch of apple slices at the beginning of the week for my daughters’ lunches, I toss them in a little bit of lemon juice before putting them in individual ziploc bags. They last the whole week in the fridge without turning brown. So for these Thanksgiving treats, you could toss the apples in a little bit of lemon juice and let them dry a bit before you dip them. We stored ours in the fridge in a ziploc bag after they were made, and we had all of them eaten within two days of making them, so ours didn’t turn brown. I would definitely recommend eating them within two days of making them, though. Hope that helps!